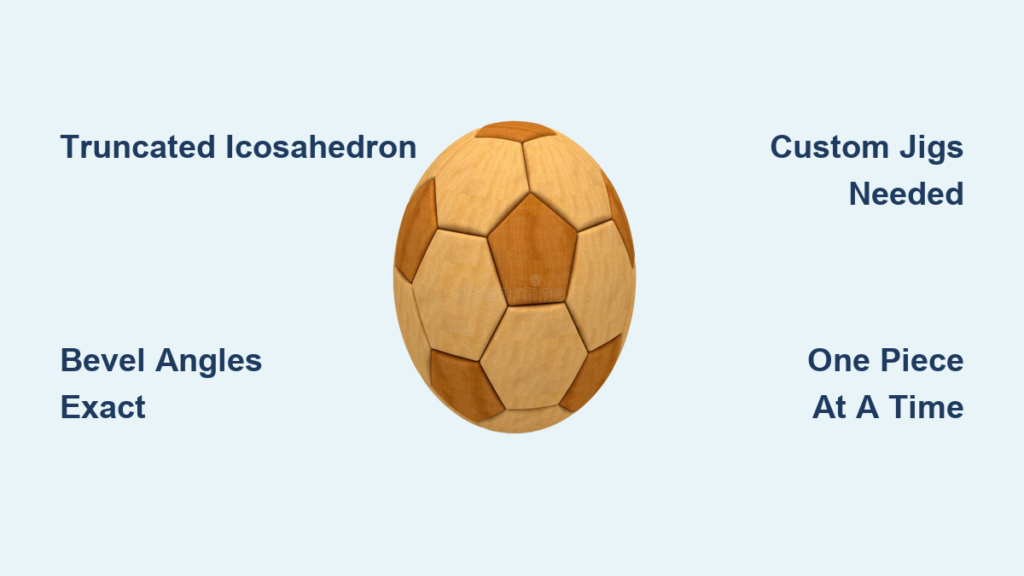
Imagine holding a perfect wooden replica of a classic soccer ball, its 32 precisely cut hexagons and pentagons curving into a near-perfect sphere. This isn’t just a craft project. It is a fusion of geometry, woodworking mastery, and patience that challenges even experienced woodworkers. The wooden soccer ball, modeled after a truncated icosahedron, is one of the most rewarding yet difficult builds in fine woodworking.
This guide reveals how to make a wooden soccer ball with professional precision. You will learn the exact bevel angles, dimensions, and assembly methods needed to avoid common pitfalls. From selecting hardwoods like walnut and white oak to shaping the final sphere on a lathe, every step is broken down for accuracy and repeatability.
Understanding the Truncated Icosahedron Geometry
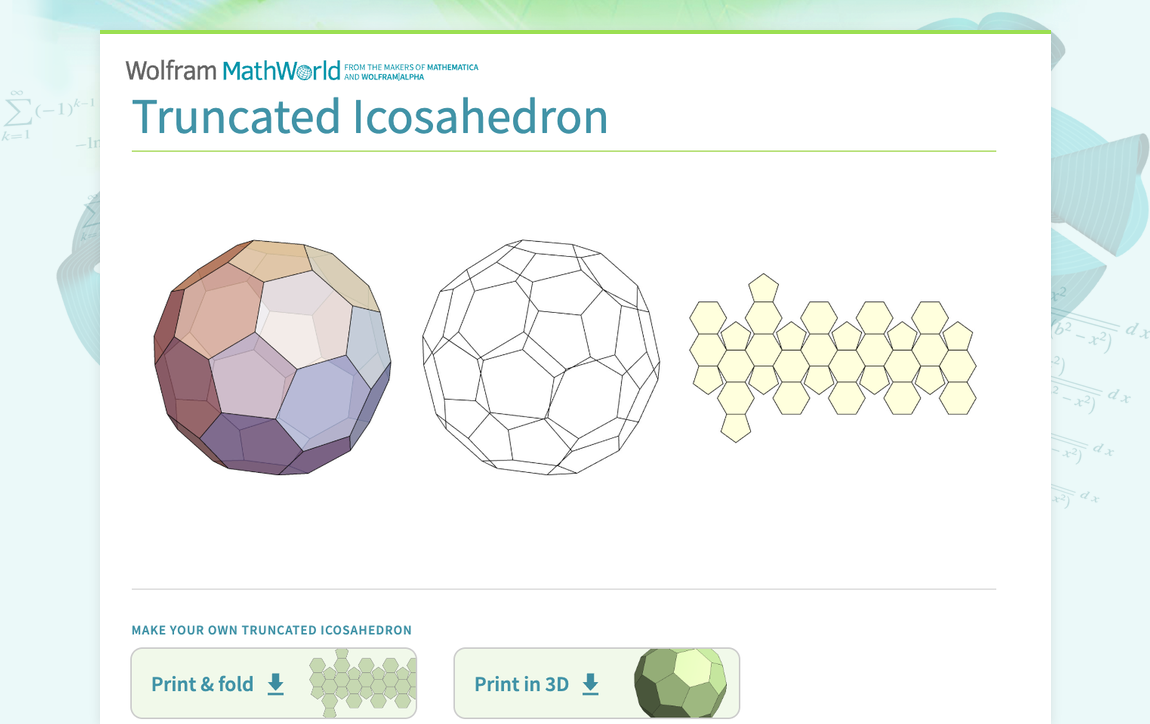
The wooden soccer ball is not a random shape. It is a truncated icosahedron, a geometric solid with 32 faces. This structure consists of 20 regular hexagons and 12 regular pentagons arranged in the classic soccer ball pattern. No two pentagons touch each other. Each pentagon is surrounded entirely by hexagons, which allows the form to close into a sphere.
This polyhedron has 90 edges and 60 vertices, following Euler’s formula where V minus E plus F equals 2. To build it correctly, every piece must be cut with exact edge lengths and precise bevel angles. Even a 0.1 degree error can accumulate across 90 joints, causing visible gaps or misalignment. The final shape relies on perfect symmetry, so consistency in thickness, angle, and dimension is essential.
Cutting the 20 Hexagons and 12 Pentagons
You will need to fabricate 20 identical hexagonal segments and 12 identical pentagonal segments from solid hardwood. Cut your blanks slightly oversized, about 4 inches square, to allow room for beveling without weakening the final edges.
For best results, use stable fine-grained woods like hard maple, white oak, or walnut. The material should be at least three-quarters inch thick. Thinner stock risks chipping during beveling and turning. Maintain uniform thickness across all pieces. Any variation will throw off the dihedral angles and compromise the final fit.
The key dimensions to remember include:
- Standard ball diameter: 8.5 inches
- Edge length: 48 mm
- Distance across flats for hexagons: 3.291 inches
Setting Correct Bevel Angles for Seamless Joints

The key to seamless assembly lies in the edge bevels, the angles cut along each side of the polygons. These determine how the faces meet in 3D space. For highest accuracy, use two different bevels on hexagons.
The correct angles are:
- 18.69 degrees for edges that join with pentagons
- 20.903 degrees for edges that join with other hexagons
Alternatively, some builders use a uniform bevel system where hexagons are cut at 20.921 degrees and pentagons at 16.407 degrees. This dual-angle system reflects the true dihedral angles of the truncated icosahedron. The hexagon-pentagon joint creates approximately 142 degrees internal angle, while the hexagon-hexagon joint creates approximately 138 degrees.
Use a digital angle gauge or precision protractor to set your saw or sander. Never rely on stock table saw markings.
Building Essential Jigs and Fixtures
Without jigs, achieving 32 identical accurately beveled pieces is nearly impossible. Invest time in building these critical fixtures before cutting any wood.
Build a Fixed-Angle Sled System
This jig-based method uses custom sleds on a table saw to cut identical beveled segments with zero blade adjustment. Build two sleds, a hexagon sled angled at 20.905 degrees and a pentagon sled angled at 16.46 degrees. Keep the table saw blade at 90 degrees. The sled does the angling. Clamp a spacer block to control final edge length. Make repeatable cuts by rotating the blank after each pass.
Make a Third-Side Sled for Hexagons
After cutting four sides of a hexagon, the fifth and sixth become tricky to align. A third-side sled solves this problem. It features a stop block with pins to hold the workpiece. The sled base is set at 120 degrees, the internal angle of a regular hexagon. The fence rides under the blade for stability and precise registration.
Construct a Pentagon Sled
Pentagons require consistent 108 degree internal angles. Use two walnut 2 by 2 blocks joined perpendicularly. The first cut sets the bevel using the standard fence. The second cut rotates and uses a 72 degree angle between fence and blade. Add a stop block to prevent over-cutting.
Testing the Fit Before Glue-Up
Never glue the first piece without testing. A dry run reveals errors early, before irreversible commitment. Assemble a partial cluster by placing one pentagon in the center and attaching five hexagons around it. Hold them together with rubber bands.
Inspect both inside and outside joints. Check whether they are tight and gap-free. Determine if the pieces lie flat or warp. If gaps appear, recheck your bevel angles or edge lengths. Even slight inconsistencies will compound during full assembly.
Pro builders note that even well-fitted builds can feel a little wobbly until fully closed, so minor flexibility is normal during test assembly.
Assembling One Piece at a Time
The golden rule of wooden soccer ball construction is never glue sub-assemblies. Attempting to join five hexagons into a cap and attach it later leads to misalignment. The truncated icosahedron tolerates no shortcuts.
Follow this assembly sequence:
- Start with a central pentagon
- Glue one hexagon to it using PVA glue or epoxy
- Let it partially set before adding the next
- Continue adding pieces, alternating between pentagons and hexagons
- Use rubber bands or tape to apply even pressure without crushing edges
Work slowly. Each new piece must align with two or more existing faces. If a joint resists, do not force it. Sand the edge slightly and retest.
While PVA works, epoxy is preferred because it offers longer open time for adjustments, fills minor imperfections, and bonds stronger across end grain. Apply sparingly to avoid squeeze-out that interferes with fit. Cure overnight before removing bands.
Shaping Into a Smooth Sphere on the Lathe
Once glued and cured, the faceted polyhedron must become a smooth ball. This is done using a wood lathe and waste blocks.
Mount on a lathe using waste blocks:
- Machine two round waste blocks from scrap wood
- Glue them to opposite flat faces of the ball, preferably hexagons
- Pre-drill center holes in the blocks
- Mount the assembly between lathe centers
- Turn down the faceted areas until a smooth sphere emerges
Use a plywood template cut to the correct radius to check profile accuracy. After turning, cut or chisel off the waste blocks. Hand-sand the remaining flat faces to blend into the curve. Start with 120-grit paper and progress to 600-grit for a glass-smooth finish.
For light contouring or label removal, use a bench grinder at 1725 RPM, half speed, to avoid burning the wood.
Selecting Contrasting Wood Types
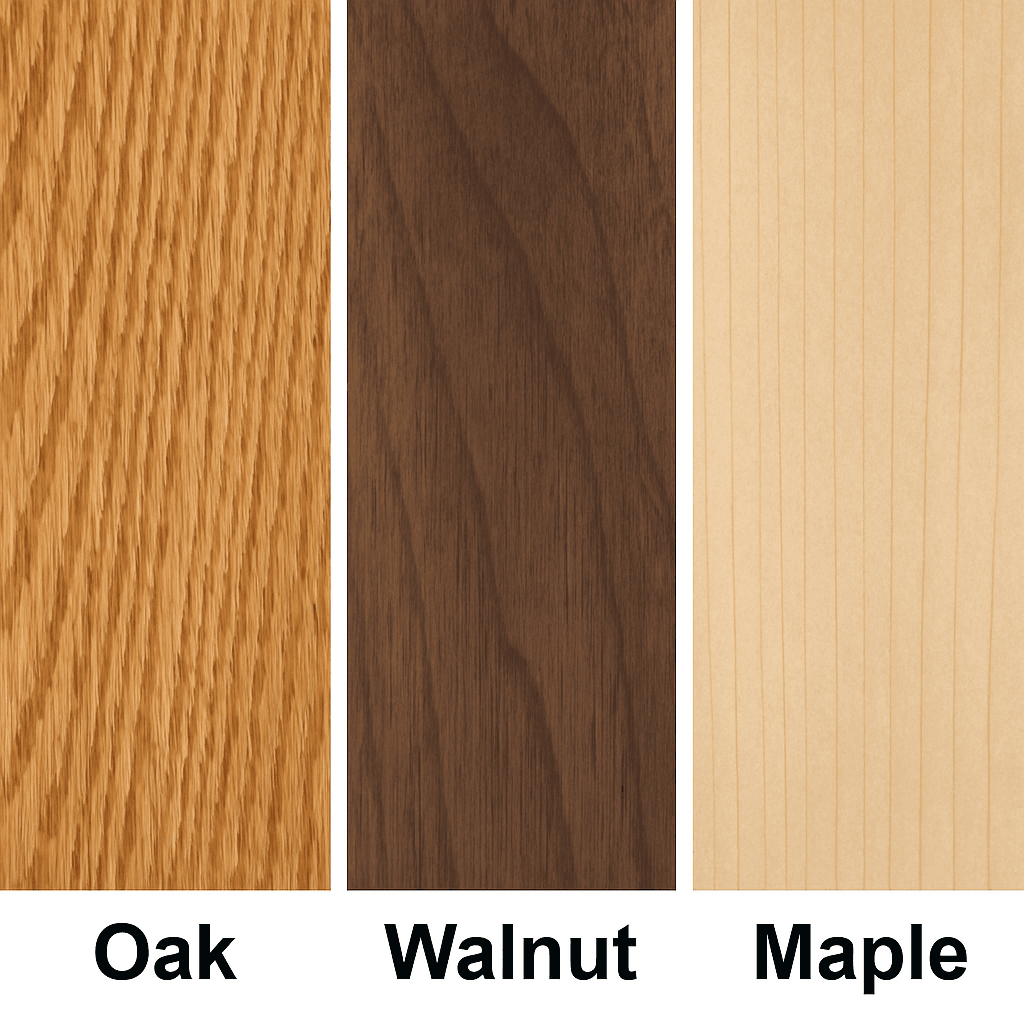
A classic soccer ball has black pentagons and white hexagons. Replicate this visual effect with wood contrast. Recommended pairings include walnut for pentagons with white oak or hard maple for hexagons. Cherry works well paired with hard maple. Purpleheart creates striking contrast with ambrosia maple. Wenge pairs beautifully with sycamore.
Avoid softwoods or veneer plywood. They lack durability and clean sanding ability. Solid hardwoods ensure sharp edges and a premium finish.
Applying a High-Gloss Finish
A flawless finish makes the geometry pop. Seal with epoxy by applying one thin coat of clear epoxy resin using a brush or foam roller. Let it self-level without overworking. This seals pores and creates a smooth base.
Top with gloss polyurethane by applying 5 coats of high-gloss polyurethane. Sand lightly with 600-grit paper between coats. For even application, rotate the ball on a slow-turning lathe or a blue painter’s tape roll. Alternatively, use clear spray varnish for a brush-mark-free finish that enhances grain depth.
Displaying Your Finished Wooden Soccer Ball
A finished wooden soccer ball deserves proper presentation. Install a hanger bolt by drilling a small hole into a pentagon or hexagon. Insert a hanger bolt secured with dowel and epoxy. Plug the hole and cover with a mounting cap. Hang on a wall or stand.
Alternatively, craft a dished wooden stand by turning a shallow dish on the lathe. Carve a cradle that matches the ball’s curvature. Finish to match the ball. This protects the bottom face and adds elegance to your display.
Avoiding Common Pitfalls
Even experts make mistakes. Here is how to avoid the most common errors.
Do not glue sub-assemblies. Pre-gluing groups like five-hexagon caps creates alignment errors. The geometry only works when built one piece at a time.
Do not use thin or uneven blanks. Stock thinner than three-quarters inch risks breakage during turning. Always maintain uniform thickness.
Prevent template swelling by gluing paper templates to the wood side, not the paper. Moisture from glue can warp the paper, distorting your cut.
Fix minor gaps by filling with CA glue plus sawdust paste or fine wood putty. Sand smooth before finishing.
Frequently Asked Questions About Making a Wooden Soccer Ball
What is the geometry of a wooden soccer ball?
The wooden soccer ball is a truncated icosahedron, consisting of 32 faces. There are 20 regular hexagons and 12 regular pentagons. This is the same geometric structure used in official soccer balls.
What bevel angles do I need to cut?
For accurate construction, cut hexagon edges at 18.69 degrees for pentagon joints and 20.903 degrees for hexagon-hexagon joints. Alternatively, use a uniform system with hexagons at 20.921 degrees and pentagons at 16.407 degrees.
What tools are required to build a wooden soccer ball?
You will need a table saw, disc or belt sander, custom jigs or sleds, clamps, sandpaper, and a wood lathe for final shaping. A digital angle gauge ensures precise bevel setup.
How long does it take to build a wooden soccer ball?
The build takes 40 to 60 hours depending on experience level. Cutting and beveling the 32 pieces takes the most time. Assembly requires careful one-piece-at-a-time gluing. Final lathe turning and finishing add additional hours.
Can I scale the size of my wooden soccer ball?
Yes. The bevel angles remain constant regardless of scale because they are determined by geometry, not size. Adjust the edge length to change diameter. For example, 48 mm edges yield an 8.5 inch ball while 24 mm edges produce a 4 inch miniature.
What is the best wood combination for a soccer ball look?
Walnut pentagons with white oak hexagons create the classic black and white appearance. Hard maple provides a lighter alternative. Cherry adds warm reddish tones that age beautifully over time.
Key Takeaways for Making a Wooden Soccer Ball
The wooden soccer ball is more than a project. It is a testament to craftsmanship combining math, art, and woodworking skill. Every angle, cut, and curve leads toward geometric perfection.
Success requires precision in three key areas. First, use accurate bevel angles of 18.69 degrees and 20.903 degrees for alternating hexagon joints. Second, build custom jigs or sleds to ensure identical pieces across all 32 segments. Third, assemble one piece at a time using rubber band clamping rather than pre-building sub-assemblies.
With the right tools, jigs, and patience, you can create a stunning sphere that showcases the beauty of geometry in wood. Whether your first build is flawless or flawed, the journey is worth taking. As one builder put it, if I can do this in my small garage shop, you can too.