You love the look, feel, and performance of basketball shoes—but what if you could make your own? Whether you’re a sneakerhead, a DIY enthusiast, or an artist pushing the boundaries of wearable design, making basketball shoes is more accessible than ever. From handcrafted leather builds to upcycled basketballs and high-tech customization, this guide walks you through every method, material, and technique so you can create a pair that’s truly one of a kind.
You’ll learn how to build from scratch, enhance performance, and avoid common mistakes, all while understanding which methods are best for art versus actual play. Whether you want to craft a wearable sculpture or design game-ready kicks, the choice is yours.
Design Your Custom Basketball Shoe
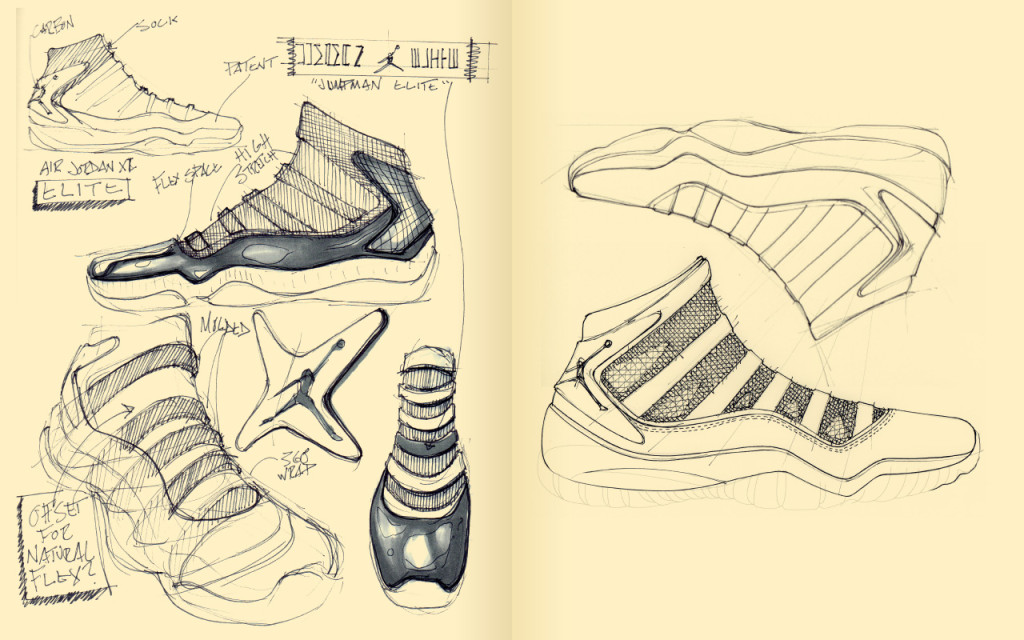
Before cutting any material, you need a clear vision. Making basketball shoes isn’t just about assembly. It starts with intentional design that balances form, function, and personal expression.
Sketch Your Silhouette First
Begin with a rough sketch of your desired shoe. Focus on these key elements:
- Upper height (low, mid, or high-top)
- Toe box shape (rounded, pointed, or aggressive)
- Closure style (laces, straps, zippers, or Velcro)
- Aesthetic themes (retro, futuristic, streetwear)
Use masking tape on your foot to prototype the shape. Adjust until it feels balanced and proportionate. This mock-up helps avoid costly material mistakes later.
Choose Your Build Path
Not all homemade basketball shoes are created equal. Your design choice depends on your goal:
- Artistic expression? Go handcrafted or upcycled.
- Wearable comfort? Use leatherworking techniques.
- Game-ready performance? Opt for commercial customization.
Each method uses different materials, tools, and time investment. Choose wisely based on your end use.
Build With Leather: DIY Sneaker Construction

This is the most practical way to make durable, custom-fit basketball shoes at home. Using real leather and simple tools, you can craft a professional-quality pair with full control over color, texture, and fit.
Gather Your Materials and Tools
| Component | Material | Purpose |
|---|---|---|
| Sole Base | 10 oz heavy-duty leather | Stiff foundation for structure |
| Upper Panels | 1–2 oz vegetable-tanned leather | Lightweight, moldable covering |
| Lining | Pigskin or soft fabric | Comfort against the foot |
| Insole | 4–5 mm yoga mat foam | Cushioning and shock absorption |
| Adhesive | Contact cement | Strong, flexible bond |
| Thread | Waxed polyester | Durable stitching |
| Tools | Scratch awl, sandpaper, weights, scissors | Cutting, punching, shaping, pressing |
Patterns are available online in multiple sizes. Print your exact size without scaling.
Prepare and Cut the Leather
- Roughen Surfaces: Use 180-grit sandpaper on all bonding areas to improve glue adhesion.
- Clean Dust: Wipe with a dry cloth.
- Cut Precisely: Follow the printed pattern, labeling each piece (left/right, front/back).
- Line Each Piece: Attach pigskin lining to the inside of every leather section before assembly.
Assemble the Sole and Upper
- Create the Base: Glue the 10 oz sole leather to a cardboard template. Clamp under heavy weights or wrap tightly in rope (burrito method) for even pressure. Let dry completely.
- Attach Side Strips: Start from the center and stitch forward. Align holes punched every 9 mm using a scratch awl.
- Mount the Upper: Place the upper over the sole. Begin stitching at the center tongue, work around the toe, and finish at the heel.
Pro Tip: Never save the front for last. This distorts tension and causes puckering.
Finish With Style
- Add contrast stitching for bold detail.
- Burnish edges with a smooth tool for a polished look.
- Paint or airbrush designs like gradients or stripes.
- Attach custom laces, pull tabs, or branded logos.
This method yields a stylish, wearable shoe. It’s ideal for casual use or light activity, but not intense court play unless reinforced with rubber soles.
Upcycle a Basketball Into Shoes
Turn a worn-out basketball into a wearable art piece. This method is eco-friendly, creative, and perfect for streetwear statements.
Deconstruct the Basketball
- Peel the Leather Casing: Separate the outer leather panels from the inner rubber bladder.
- Save the Seams: Remove the black rubber stitching channels. They’ll be used as decorative trim.
- Identify Flat Zones: The pump valve area is the only flat, durable section. It’s ideal for the heel.
Build the Shoe Structure
- Toe Box: Join two curved leather pieces. Hide the seam with black rubber strips.
- Side Panels: Layer basketball leather with cork for added stiffness.
- Heel Counter: Reinforce with cork to prevent collapse.
- Front Panel: Curve to match the ball’s natural dome shape.
Customize the Details
- Tongue: Print a basketball stencil, iron it on, and paint with authentic orange and white panels.
- Interior: Insert a soft sock liner from an old sneaker for comfort.
- Branding: Add a mini basketball hoop on the side as a playful accent.
- Color Balance: Use orange and white paint to offset black stripes and enhance authenticity.
This method creates eye-catching footwear. But due to limited flexibility and lack of engineered support, it’s best for display or casual wear, not performance.
Enhance Traction for Real Court Use
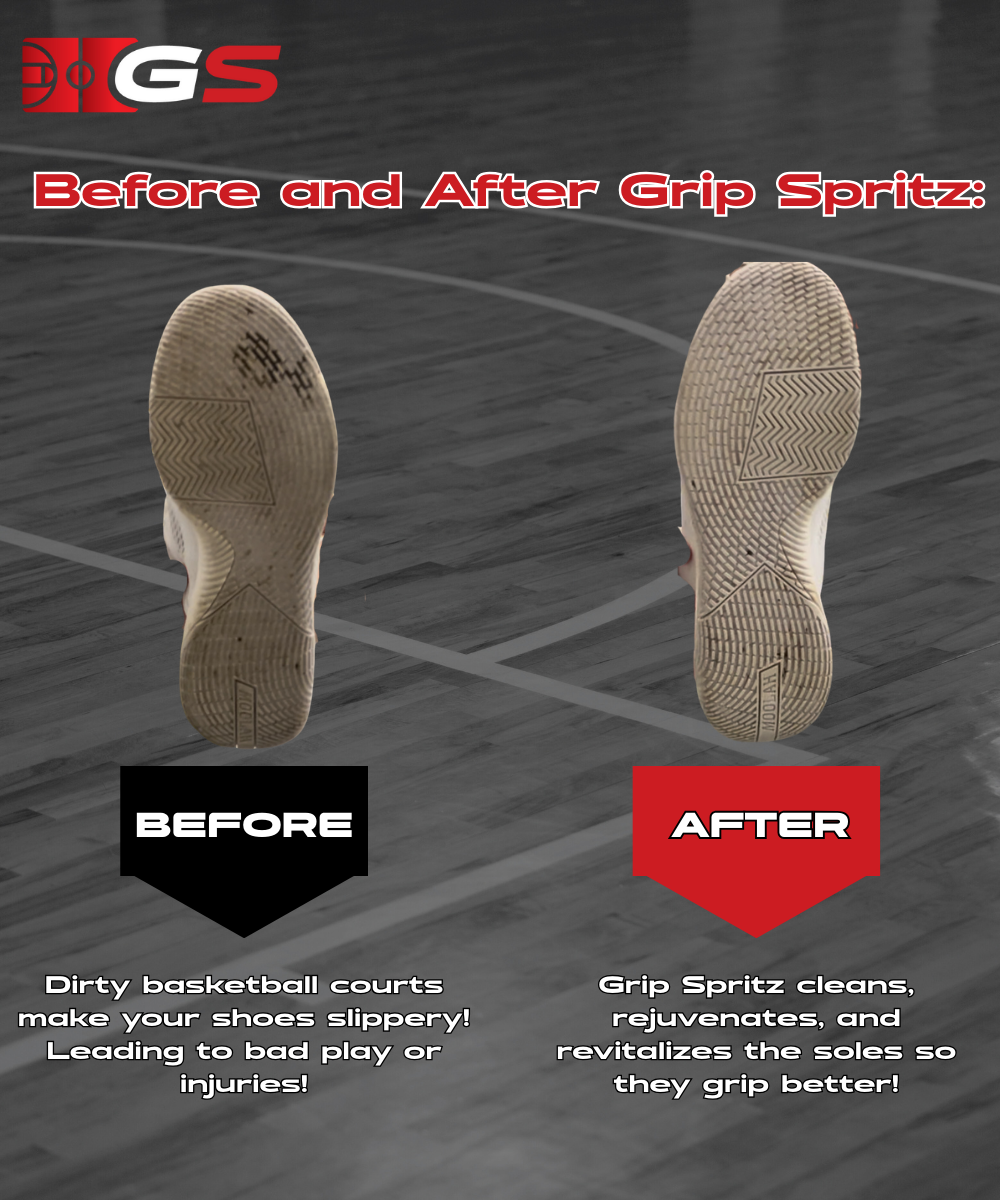
Even the best homemade shoes need grip. If you plan to step on a real court, traction is not optional. It’s essential.
Clean Soles the Right Way
Dirty soles equal zero grip. Follow this cleaning protocol:
- Brush: Use a toothbrush with warm water and mild soap.
- Scrub Grooves: Remove dust and grime from every channel.
- Pick Deep Debris: Use a toothpick for stuck particles.
- Dry Completely: Air-dry overnight. Never use heat. Hairdryers warp rubber and weaken glue.
Use a Traction Mat (Sticky Pad)
For instant grip during games:
- Step on and off a disposable adhesive mat.
- Peel off the top layer when dirty.
- Lasts 30 to 75 uses. Ideal for mid-game refresh.
Apply Grip Spray (Not Hairspray)
Use specialized sprays like Grip Spritz:
- Sprays clean and condition rubber.
- Wipe with a cotton towel for instant traction.
- Avoid hairspray or hand sanitizer. They dry out rubber and attract more dust.
Know When to Replace
Most soles last 45 to 60 hours of play. Replace shoes when:
- Tread is completely smooth.
- Cleaning no longer restores grip.
- Rubber feels hardened or cracked.
Upgrade With Smart Features

Take your custom shoes beyond aesthetics with functional enhancements.
Add Glow-in-the-Dark Elements
- Midsole: Use glow-in-the-dark paint or pre-charged strips.
- Heel: Embed strips that charge under light and emit bright green at night.
- Tongue: Add motion-activated lights that flash when you lift your foot.
Integrate Color-Shifting Materials
- Lulon Fabric: Changes from black to clear when heated. Perfect for dynamic visuals.
- Thermochromic Paint: Apply to midsoles or panels for temperature-responsive designs.
Use Carbon Fiber Accents
- Cut into Pieces: Side wrap, midsole panel, and toe guard.
- Sand Edges Smooth: Prevent sharpness and create curves.
- Reinforce with a Shank: Maintain structural integrity after sanding.
- Finish with Upturned Rubber Sole: Improves both look and wear resistance.
These features elevate your shoes from craft projects to futuristic wearables. But they’re still not ideal for pro-level performance.
Customize Through Commercial Platforms
If you want game-ready performance with full personalization, skip DIY and use professional customization services.
Nike By You: Signature Style
- Models: LeBron, Kobe, KD, Giannis, Sabrina, Ja Morant, and more.
- Options:
- Colors, materials, and finishes.
- Personal text on heels or tongues.
- Nike Air Zoom technology.
- Pricing: $100 to $170
- Sizing: Men’s 5 to 14, Women’s 5 to 12 (half sizes included)
Perfect for players who want pro performance with unique flair.
Shoe Zero: Team and Bulk Customization
Ideal for squads, events, or streetwear drops:
- 50+ Silhouettes: Low tops, high tops, cushioned soles.
- Full-Color Control: Upload logos, artwork, or text.
- Materials:
- Canvas or synthetic leather uppers.
- Rubber outsoles for indoor traction.
- EVA foam insoles for comfort.
- Pricing: €97.95 to €124.95
- Production: On-demand, ships in days.
Use their 3D Customizer to preview every detail before ordering.
Choose the Right Method for Your Goal
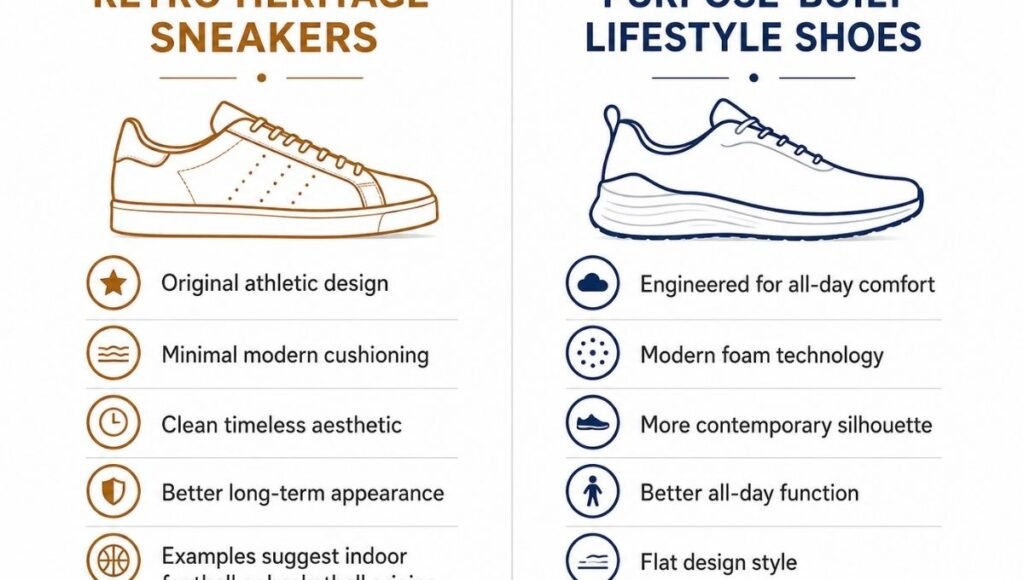
Not every how to make basketball shoes method suits every purpose. Match your approach to your intention.
| Goal | Best Method |
|---|---|
| Artistic Expression | Handcrafted or upcycled shoes |
| Personal Craftsmanship | DIY leatherworking |
| Streetwear Statement | Basketball-to-shoe upcycle |
| Game-Ready Performance | Nike By You or Shoe Zero |
| Team Branding | Shoe Zero bulk orders |
Handcrafted shoes are not factory-grade. They’re made for expression, not slam dunks. If you need real traction, support, and durability, commercial customization is the only reliable path.
Avoid Common DIY Mistakes
Even small errors can ruin your build. Steer clear of these pitfalls:
Skipping Leather Prep
Failing to sand and clean leather before gluing leads to weak bonds and peeling. Always roughen surfaces and let contact cement go tacky (2 to 3 minutes) before joining.
Crowding Stitching Holes
Holes closer than 9 mm weaken the leather and cause tearing. Space them evenly for durability.
Using Hairspray for Grip
It feels sticky at first. But alcohol dries out rubber, making it brittle and slippery over time. Use only approved grip sprays.
Applying Heat to Dry Shoes
Never use sunlight or hairdryers after cleaning. Heat breaks down adhesives and warps soles. Air-dry only.
Ignoring Structural Reinforcement
Thin leather alone won’t support your foot. Reinforce the heel, toe, and arch with cork, foam, or shanks.
Final Thoughts: Craft With Purpose
Making basketball shoes is a powerful blend of art, engineering, and personal vision. Whether you’re hand-stitching leather, upcycling a basketball, or customizing online, each method offers unique rewards.
For artists, build wearable sculptures with glow effects, carbon fiber, and bold designs. For makers, master leatherworking and create shoes that fit like no store-bought pair. For players, choose Nike By You or Shoe Zero for true performance with your personal touch.
Remember that DIY shoes are not built for intense competition. They’re for expression, experimentation, and innovation. If you need to cut, jump, and sprint, stick with professionally engineered footwear.
But if you want to stand out, tell a story, or simply build something with your hands, now you know how to make basketball shoes that reflect who you are.
Frequently Asked Questions About Making Basketball Shoes
Can I make basketball shoes that are actually wearable on the court?
Yes, but with limitations. DIY leatherworking methods produce stylish, comfortable shoes for casual wear. However, they lack the engineered support, cushioning, and traction of factory-made footwear. For actual game play, commercial customization services like Nike By You offer better results.
What materials do I need to make basketball shoes from scratch?
For leatherworking, you’ll need 10 oz heavy-duty leather for the sole, 1 to 2 oz vegetable-tanned leather for uppers, pigskin for lining, 4 to 5 mm yoga mat foam for padding, contact cement, waxed polyester thread, and basic tools like a scratch awl and sandpaper.
How long does it take to make basketball shoes at home?
The leatherworking method takes several hours to a full day for one pair, plus drying time. More complex handcrafted designs with smart features can take days or weeks. Commercial customization only requires design time, with production handled by the manufacturer.
Are upcycled basketball shoes durable?
Upcycled basketball shoes are creative art pieces rather than performance footwear. The leather from basketballs is durable for casual wear, but the construction lacks proper arch support and structural reinforcement needed for athletic activity.
What’s the most affordable way to get custom basketball shoes?
The cheapest route is upcycling a used basketball, which costs almost nothing. DIY leatherworking requires an investment in materials (roughly $50 to $100). Commercial customization through Nike By You or Shoe Zero ranges from $100 to $170 per pair.
Can I add glow-in-the-dark features to my homemade shoes?
Absolutely. You can use glow-in-the-dark paint on midsoles and heels, embed pre-charged strips, or add motion-activated lights to the tongue. These features work best on handcrafted or custom-designed shoes rather than performance-focused pairs.
Key Takeaways for Making Your Own Basketball Shoes
The journey of making basketball shoes starts with understanding your goal. Artistic expression, personal craftsmanship, and game-ready performance each require different approaches and materials. Choose your path based on what you want to achieve.
DIY leatherworking offers the best balance of creativity and wearability. By using 10 oz leather for soles, 1 to 2 oz for uppers, and proper techniques like 9 mm stitching spacing, you can create comfortable, stylish footwear. Remember to prep surfaces with 180-grit sandpaper and allow contact cement to become tacky before bonding.
For true court performance, stick with professionally engineered options like Nike By You or Shoe Zero. These services provide factory-grade traction, support, and durability while letting you customize colors, materials, and personal details. Your homemade creations will stand out as unique expressions of your vision, whether you display them or wear them casually around town.