Imagine your child asking for a soccer ball, but you don’t have one and buying a new one is not an option. What if you could make one from trash right now using items you already have at home? Or turn a plain ball into a colorful masterpiece with markers and paint?
This guide covers how to make a soccer ball using three practical methods. You will learn to craft a playable ball from recycled materials, customize a decorative ball with art supplies, and draw a realistic soccer ball step by step. Each method is beginner-friendly and requires minimal tools.
Build a Playable Ball From Recycled Materials
This method creates a durable, bouncy soccer ball from household waste. Inspired by children in Rwanda and Zambia, it uses layered plastic, cloth, and tight twine wrapping to mimic real ball performance.
Create a Tight Plastic Core
Crumple one plastic shopping bag into a fist-sized ball. Squeeze it tightly to remove air and form a dense center. This core gives the ball its structure and bounce.
Use thicker bags for better durability. Avoid tearing by folding, not stretching, the plastic. Keep the shape as round as possible by flattening any sharp edges.
A compact core produces better bounce. If the core feels loose, re-crumple with a second bag inside.
Layer for Density and Shape
Wrap the core in alternating layers of newspaper, cloth rags, and plastic bags. Each layer should be tightly compressed. Push out air pockets as you go.
Wrap in a spiral motion for even coverage. Rotate the ball frequently to maintain symmetry. Stop when the ball reaches fist size, about 6 to 7 inches in diameter.
The ball should feel solid, not squishy. If it dents easily, add more newspaper layers.
Seal With a Heavy-Duty Outer Layer
Cover the final layer with the thickest plastic available, such as a reinforced shopping bag. This acts as a protective shell.
Smooth out wrinkles to avoid weak spots. Tuck edges tightly underneath. Do not tie or cut the plastic. Simply wrap it snugly around the ball.
This outer layer prevents moisture absorption and reduces tearing during active play.
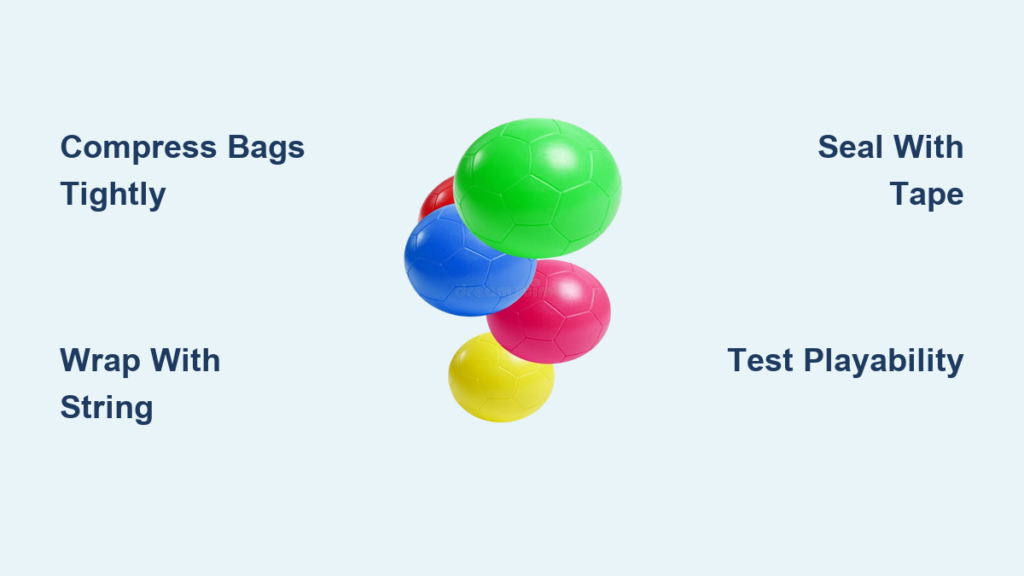
Wrap Tightly With Twine
Secure everything with twine using a crisscross pattern. Start at the top and wrap vertically to the bottom. Rotate 90 degrees and wrap again. Repeat 3 to 4 times for full coverage. Tie knots every 2 to 3 wraps to lock tension.
Pull the twine taut with each pass. Use cotton or nylon cord at least 2mm thick. Cover all seams so no inner material shows. The cross points should resemble traditional soccer ball stitching.
Loose twine causes early failure. Test tension by squeezing. If layers shift, re-wrap immediately.
Test and Reinforce For Play
Bounce the ball on concrete or pavement 5 to 10 times. Watch for unraveling twine, bulging layers, or loss of shape.
Fix issues immediately. Add more twine over weak zones. Patch exposed areas with cloth and plastic. Retie loose knots with double hitches.
Balls with 5 or more layers of newspaper and tight twine last up to 2 weeks of daily use.
Customize a Decorative Soccer Ball
Turn a plain foam or plastic ball into a personalized work of art using Crayola supplies. This method works well for kids aged 6 and up, classrooms, or fan events.
Choose Your Base Ball
Select a lightweight foam or hollow plastic soccer ball from a craft store. Foam provides better paint adhesion but remains fragile. Plastic offers a smoother finish and greater durability. Avoid textured or rubber balls because they are difficult to draw on.
Clean the surface with a dry cloth to remove dust before starting.
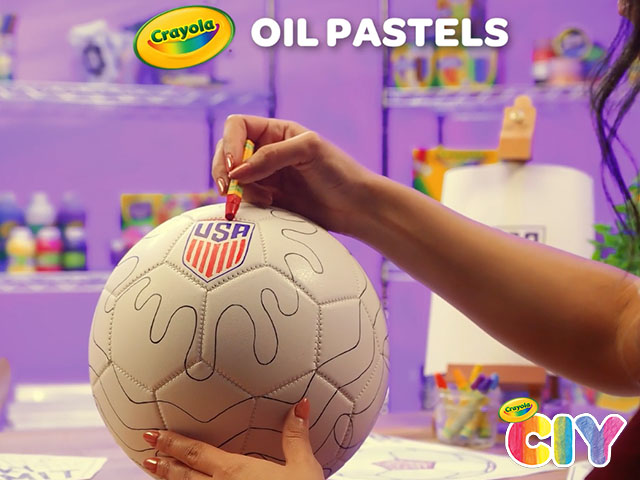
Sketch the Design First
Download the Crayola Soccer Ball Template from Crayola.com. Print it out and sketch your idea, including flags, patterns, names, or team logos. Plan color placement to avoid clashes. Use light pencil so lines do not show later.
Divide the ball into sections like orange slices to maintain symmetry throughout your design.
Outline With Fine Point Markers
Use Crayola Fine Point Doodle Markers to draw clean outlines on the ball. Start with large shapes such as stars or stripes. Trace pentagon edges if mimicking a real ball design. Let ink dry for 1 to 2 minutes before touching.
This step prevents colors from bleeding and defines your artwork clearly.
Fill With Oil Pastels or Paint
For large areas, use Crayola Oil Pastels. They are blendable, vibrant, and work great on curves. Apply in circular motions for even coverage. Layer colors for depth, such as dark blue under light blue.
For solid base coats, use Crayola Acrylic Paint. Apply thin layers with a small brush. Wait 10 to 15 minutes between coats.
Work from top to bottom to avoid smudging. Rest the ball on a cup to keep your hands off wet areas.
Add Shine With Metallic Markers
Highlight edges, borders, or logos with Crayola Metallic Markers. Silver or gold on pentagon outlines creates instant pop. Add dots or stars for festive flair. Sign your name in a corner.
Let the final piece dry for 1 hour before handling.
Seal and Display
Spray with clear acrylic sealer to protect against smudges and moisture. This adds a slight gloss finish. Use in a well-ventilated area.
This method creates a display piece, not a ball for heavy kicking. Friction will wear down the design over time.
Draw a Realistic Soccer Ball

Learn to draw a 3D-looking soccer ball in under 30 minutes. This method teaches geometry and shading, perfect for school projects or beginner artists.
Draw a Perfect Base Circle
Lightly sketch a circle using one of these methods. Trace a cup or lid that is 6 to 8 inches in diameter. Use a compass for precision. Mark the center point with a dot.
Keep lines faint because you will erase them later.
Divide Into Five Equal Sections
From the center, draw a vertical line to the top edge. Now divide the circle’s edge into five equal parts. Each gap spans approximately 72 degrees, which is one-fifth of 360 degrees. Estimate by eye or use a protractor. Mark points around the perimeter.
Connect each point to the center with light lines, like a starburst.
Form the Central Pentagon
Link every two adjacent outer points with straight lines. The result is a five-sided shape in the center. This represents a black pentagon panel. Erase radial lines inside the pentagon.
If sides are uneven, redraw with a ruler for precision.
Add Curved Triangular Panels
From each pentagon side, draw a curved triangle outward. The base equals the pentagon edge. The tip extends toward the circle edge. The sides curve slightly outward to simulate sphere shape.
These represent white hexagons wrapping around the ball. Make triangles smaller on the far side to suggest depth.
Color With Classic Black and White
Fill in the central pentagon with black. Leave the five curved triangles white or lightly shade them. Traditional soccer balls have 12 black pentagons and 20 white hexagons, but this simplified view shows only the front.
Use rainbow colors, team logos, or gradients for creative alternatives.
Shade for 3D Effect
Add realism with shading. Assume the light source comes from the top-left. Shade the right and bottom edges darker. Use a pencil to blend for smooth gradients.
Darken the far-side triangles slightly. This creates volume and roundness. Avoid a flat, cartoonish look.
Use a tissue to smudge pencil for soft shadows.
Compare All Three Methods

| Feature | Recycled Play Ball | Decorative Art Ball | Drawing the Ball |
|---|---|---|---|
| Time | 30 to 60 minutes | 20 to 45 minutes | 10 to 30 minutes |
| Cost | Zero (uses trash) | $5 to $15 | Under $1 |
| Durability | Medium (outdoor use) | Low (display only) | Not applicable |
| Best For | Play in backyards or schools | Birthdays, crafts, gifts | Art class, homework |
| Skill Level | Intermediate | Beginner plus | Beginner |
| Tools Needed | Bags, twine, rags | Markers, paint, ball | Pencil, paper, eraser |
Why These Methods Work
Recycled balls bounce because layered plastic traps air and resists compression. Twine tension is the number one factor in durability. Loose wrapping leads to quick failure. Cloth inner layers absorb impact, reducing bounce loss over time.
In Zambia, girls have made balls lasting over a month with daily use using only plastic and string.
Avoid Common Mistakes
Do not use thin bags only because they tear on the first kick. Do not skip the outer plastic layer because it absorbs water and gets heavy. Do not draw the pentagon too large because it distorts the entire pattern. Do not let paint smudge because it ruins the clean design.
When to Use Each Method
Build a ball from trash when you have no ball at home. Decorate with Crayola when you need a craft project. Draw it step by step when teaching geometry or art.
Frequently Asked Questions About Making a Soccer Ball
Can I make a soccer ball that actually bounces?
Yes, a properly constructed recycled ball bounces effectively. The key is using a tight plastic core and wrapping with strong twine. Multiple layers of newspaper add firmness, while cloth rags improve shock absorption. Balls made with these techniques last up to two weeks of daily play.
What materials do I need to make a playable soccer ball?
You need plastic shopping bags, newspaper, cloth rags, and twine. All these items are household waste that would otherwise be discarded. No special purchase is required.
Is the decorative soccer ball method safe for children?
Yes, this method is safe for children aged 6 and up with adult supervision. It uses non-toxic Crayola markers, oil pastels, and acrylic paint. The finished ball is for display only and should not be used for play.
How long does it take to draw a realistic soccer ball?
Drawing a realistic soccer ball takes 10 to 30 minutes depending on your experience level. The process involves drawing a circle, dividing it into five sections, forming a pentagon, adding curved triangles, and applying shading for a 3D effect.
Can I use the decorative method on a real soccer ball?
The decorative method works best on smooth foam or plastic balls. Textured or rubber balls resist paint and marker adhesion. The finished design will wear down with play, so these are best suited for display purposes.
Key Takeaways for Making a Soccer Ball
You now know how to make a soccer ball using three practical methods. The recycled ball method turns trash into a playable toy, perfect for communities with limited resources. The decorative method transforms plain balls into personalized art pieces for gifts or events. The drawing method teaches geometric accuracy and shading techniques.
Each method serves a different purpose. Choose the recycled approach for actual play, the art approach for creative projects, and the drawing approach for educational purposes. All three require minimal materials and basic skills.
Start today by gathering some trash, grabbing a marker, or picking up a pencil. Make a ball, play, create, and learn.