You grab your soccer ball for a quick game, only to find it flat and unresponsive. No matter how hard you pump, the needle won’t go in, air escapes instantly, or nothing happens at all. A soccer ball won’t inflate for several common reasons, but nearly every issue is fixable with the right technique and tools. Most problems stem from a dry valve, incorrect needle use, or undetected leaks, not a ruined ball. This guide walks you through proven diagnosis, inflation, and repair steps so you can get back to playing fast.
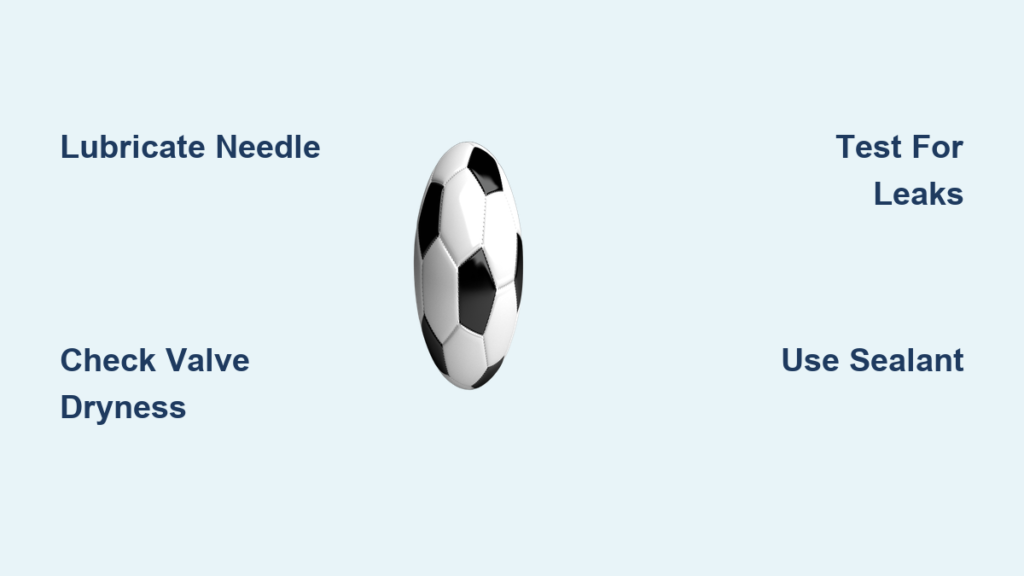
Check the Valve First
The valve is the most common culprit when a soccer ball won’t inflate. It’s a small rubber flap inside the ball’s opening that must open for air entry and seal tightly afterward. If it’s dry, stiff, or blocked, the needle won’t work properly.
Dry Valve Blocks Needle Entry
A dry valve resists needle insertion and can tear if forced. Never jam the needle in without lubrication.
- Signs include high resistance, a squeaking sound, or partial insertion only
- Fix this by applying water, saliva, or silicone spray to the needle and dropping a little into the valve
- Let it sit 1-2 minutes to soften the rubber before retrying
Clear a Clogged Valve Opening
Dirt, old sealant, or dried moisture can clog the valve.
- Use a thin pin or paperclip to gently probe the opening
- Avoid sharp objects that could puncture the bladder
- Rinse with water if debris is visible
- Soak the valve area in warm water for 5-10 minutes to loosen buildup
Test Valve Flexibility
Press a fingernail into the valve slit. It should feel slightly soft and pliable.
- Hard or cracked? The rubber has degraded. Sealant may help, but replacement is likely needed
- Stiff but intact? Lubricate and warm it up before attempting inflation again
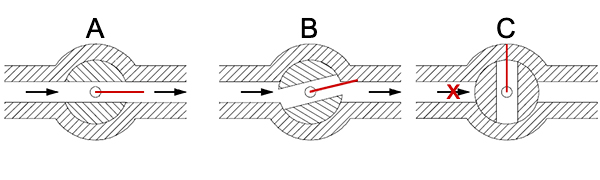
Insert the Needle Correctly
Improper needle insertion causes most inflation failures. The key is lubrication, alignment, and full insertion.
Always Lubricate the Needle
Never use a dry needle. Moisture reduces friction and prevents tearing rubber.
- Use water, spit, or silicone spray
- Avoid oil-based lubes, as they degrade rubber over time
- Re-wet the needle if it dries during use
Insert Straight and Fully
Angle or partial insertion blocks airflow and damages the valve.
- Align the needle straight with the valve opening
- Push all the way in. Users confirm this is safe and effective
- Stop if you feel sudden pop or excessive resistance. You may have torn the bladder
Use the Right Needle
Most pumps use a standard 2.5-inch to 3-inch needle for sports balls.
- Metal needles are durable but can corrode over time
- Plastic-coated needles reduce friction and protect the valve
- Replace bent or dull needles. They won’t open the valve cleanly
Diagnose Why Air Won’t Stay In
If the ball accepts air but deflates quickly, there’s a leak. Find it before attempting repair.
Perform a Water Submersion Test
This is the best method to locate invisible leaks.
- Inflate the ball slightly, just enough to shape it
- Submerge in a bucket or bathtub
- Rotate slowly and watch for bubbles
- Focus on the valve base, seams between panels, and any worn spots
- Mark leak sites with a washable marker
Listen and Feel for Escapes
No water available? Hold the ball close to your ear and press around suspect areas.
- Hissing sounds indicate an active leak
- A soft spot near the valve suggests a weak seal or bladder tear
Repair Small Leaks with Sealant

For pinprick leaks or porous bladders, a tire sealant inflator is fast and effective.
Choose Non-Flammable Sealant
Use products like Super Tech Non-Flammable Formula, available at Walmart.
- Designed specifically for sports balls
- Safe for butyl and latex bladders
- Won’t ignite or damage rubber
Inject Sealant Step-by-Step
- Deflate completely by pushing the needle in and letting all air out
- Shake the can for 30 seconds to mix sealant evenly
- Attach the needle to the sealant can and insert into the ball
- Spray for 1-2 seconds, following product instructions
- Re-inflate with a pump to 6-8 PSI
- Roll the ball by hand for 1-2 minutes to spread sealant inside
How Sealant Works
The liquid rubber flows to weak spots under pressure. Air escaping pushes sealant into holes, where it bonds and hardens. This repairs microscopic leaks in seams or bladder material.
Prevent Future Inflation Issues
Most problems are avoidable with simple habits.
Inflate at the Right Pressure
Over-inflation stretches and weakens the bladder.
- Check the label. Most balls need 6-8 PSI
- Use a pressure gauge. Hand-squeezing is inaccurate
- Never exceed the max PSI printed on the ball
Pump Slowly and Pause
Rapid pumping stresses the bladder and causes uneven expansion.
- Inflate in short bursts
- Pause every few strokes to check firmness
- Let the ball adjust, especially if it’s been flat for weeks
Store Properly
Extreme temperatures ruin rubber.
- Keep away from hot cars, radiators, or freezing garages
- Store at 5-6 PSI if unused for over a week
- Wipe clean and dry after each use
Troubleshoot Pump and Needle Issues
Sometimes the problem isn’t the ball. It’s the pump or needle.
Test the Pump on Another Ball
- If the second ball inflates, your original ball has a leak or blocked valve
- If neither works, the pump or needle is faulty
Check Needle Attachment
- Ensure the needle is tight on the pump head
- Confirm air flows through when pumping by testing with the hose
Replace Bent or Clogged Needles
- Inspect the tip. If bent or gunked up, replace it
- Clean with warm water and a small brush
- Keep a spare needle on hand
Know When to Replace the Ball
Not every ball can be saved. Know the limits of repair.
Replace If
- Bladder is fully ruptured, confirmed by water test
- Valve is cracked or missing entirely
- Outer casing is split or delaminating
- Ball is over a year old with chronic leaks
Check the Warranty
Most recreational balls have a 30-90 day warranty for defects.
- Contact the manufacturer if failure occurred within the first month
- Save your receipt for proof of purchase
- Warranties rarely cover wear-and-tear leaks
Master the Inflation Process
Follow this checklist every time you inflate.
Pre-Inflation Checklist
- Check PSI requirement on the ball
- Lubricate the needle with water or saliva
- Inspect the valve for visible damage
- Test pump function on another object
- Use a pressure gauge
Step-by-Step Inflation
- Lubricate needle tip and valve opening
- Insert needle straight and fully
- Pump slowly, checking firmness every few strokes
- Use a gauge to reach 6-8 PSI
- Remove needle straight out without twisting
- Test by pressing the ball and listening for leaks
Avoid Common Mistakes
Even experienced users make these errors. Don’t be one of them.
Forcing a Dry Needle
This results in a torn valve and permanent air leak. Always wet the needle. It takes 2 seconds.
Inflating Too Fast
This causes uneven bladder expansion and stress points. Pump slowly and let the rubber stretch gradually.
Over-Inflating
This leads to bladder rupture and seam splits. Use a gauge. 6-8 PSI is plenty.
Leaving the Needle Inside
The valve stays open and air escapes. Remove the needle immediately after inflation.
Extend Ball Life with Maintenance
A little care goes a long way toward keeping your ball game-ready.
After Every Game
- Wipe off dirt and moisture
- Let dry completely before storing
- Reduce pressure slightly if storing long-term
Monthly Valve Care
- Apply a drop of silicone lubricant to the valve
- This helps maintain elasticity and seal
- Prevents drying and cracking
Needle Maintenance
- Clean after each use
- Store in a dry case
- Replace annually or when damaged
Frequently Asked Questions About Soccer Ball Inflation
Why won’t my soccer ball inflate even with a new pump?
The most likely cause is a dry or clogged valve. Apply water or silicone spray to both the needle and valve opening, then try again. If resistance continues, soak the valve in warm water for 5-10 minutes to soften the rubber.
How do I know if my soccer ball has a puncture?
Inflate the ball slightly and submerge it in water. Watch for bubbles rising from the surface. Focus on the valve base, seams, and any worn spots. A hissing sound or soft area near the valve also indicates a leak.
Can I use tire sealant in a soccer ball?
Yes, non-flammable tire sealant works for minor leaks. Products like Super Tech Non-Flammable Formula are safe for sports balls. Spray 1-2 seconds into a deflated ball, then inflate and roll to distribute the sealant.
What PSI should a soccer ball be inflated to?
Most soccer balls require 6-8 PSI. Check the printed label on your ball for the exact specification. Using a pressure gauge is more accurate than squeezing by hand.
Is it normal for the needle to be difficult to insert?
No. A properly lubricated needle should slide in smoothly. Difficulty indicates a dry valve. Wet the needle with water or saliva and apply a few drops into the valve opening before trying again.
Key Takeaways for Fixing a Soccer Ball That Won’t Inflate
A soccer ball that won’t inflate is rarely a lost cause. With the right technique, you can diagnose and fix most issues in under 15 minutes. Focus on the valve first. A dry or clogged valve is the number one reason a soccer ball won’t inflate, and it’s an easy fix with water or silicone lubricant.
Always use a lubricated needle and insert it straight and fully. Never force a dry needle into the valve. This is the most common cause of permanent damage. Wet the needle, push it all the way in, and pump slowly.
For balls that won’t hold air, try the water submersion test to find leaks, then use a non-flammable sealant for minor punctures. This $5 solution can save a $30 ball. Prevention beats repair every time. Lubricate the valve monthly, store properly, and always use a pressure gauge to avoid over-inflation.