If you own a portable basketball hoop, winter can be its worst enemy. Freezing temperatures, snow plows, and high winds threaten to crack the base, damage the backboard, or knock the entire system over. Knowing how to store a basketball hoop in winter properly is not just about protection. It is about extending the lifespan of your equipment and avoiding costly repairs come spring. Whether you have a portable or in-ground model, the right storage strategy prevents freeze damage, stabilizes the unit against wind, and shields components from the elements. This guide walks you through every critical step, from draining or treating the base to lowering the rim, relocating safely, and covering effectively.
Drain or Treat the Base Fluid
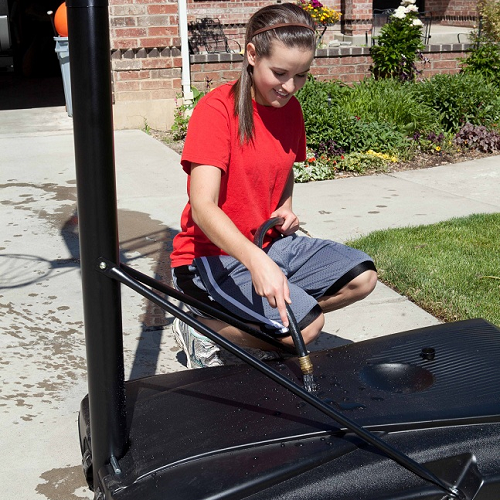
The base is the most vulnerable part of a portable basketball hoop in winter. Water inside expands by nearly 9 percent when frozen, creating pressure that can split plastic. Your choice of fluid management determines whether your hoop survives the season.
Drain Water Completely
Emptying the base is the safest way to eliminate freeze risk. If you will not use the hoop during winter, drain all water to prevent cracking, especially in older models or harsh climates.
• Locate the drain plug at the bottom of the base
• Tilt the unit slightly to ensure full drainage
• Let it sit upside down briefly to remove residual water
This method guarantees no ice buildup and is recommended for long-term winter storage. It is especially critical if your hoop’s base is not made of high-density polyethylene or if you live in an area with prolonged sub-freezing temperatures.
Use Non-Toxic Antifreeze
If draining is not practical, add non-toxic antifreeze to prevent freezing while keeping the base stable.
• Use propylene glycol-based antifreeze, which is safe for pets and lawns
• Avoid ethylene glycol, which is toxic and dangerous
• Add 1 to 2 gallons depending on base size
• Pour through the fill cap in late fall, either as a top-off or full mixture
While effective, antifreeze can be expensive for large bases. Some users report success using a partial water fill with antifreeze, but complete drainage remains the zero-risk option.
Fill with Sand for Permanent Stability

For a maintenance-free solution, replace water with sand. Sand does not freeze, evaporate, or expand, eliminating winterization needs entirely.
• Sand is 45 percent denser than water, offering superior stability
• Fill via the top cap using a funnel and bucket
• Expect higher labor and material costs upfront
Once filled, the hoop becomes harder to move, which is ideal for permanent placement. Many users switch to sand after a cracked base ruins their winter. If you plan to leave the hoop in one spot year-round, sand is the best long-term investment.
Relocate Away from Snow Plows
Where you store your hoop matters as much as how you prepare it. A poorly positioned unit can be buried, tipped, or destroyed by snow removal equipment.
Move from Curbs and Driveways
Portable hoops near streets are at high risk. Snow plows and blowers can hit the pole or backboard with enough force to crack, bend, or uproot the system.
• Relocate the hoop at least 10 feet from the curb
• Choose a garage, shed, carport, or backyard corner
• Avoid low-lying areas where snowbanks accumulate
Even if you plan to cover it, moving it out of the snow removal path is essential. One direct hit from a plow blade can total a 300-dollar-plus unit.
Choose a Sheltered Storage Spot
Ideal winter storage is indoors, but if that is not possible, pick a location with natural protection.
• A covered patio or under a deck reduces exposure
• Trees or fences act as windbreaks
• Avoid open fields or exposed corners of the yard
This reduces wind load and keeps snow from piling on the backboard, which can warp or stress the mounting hardware over time.
Lower the Rim to 7.5 Feet
Adjusting the height is not just for kids. It is a crucial winter prep step for all portable and in-ground hoops.
Reduce Wind Resistance
A raised hoop acts like a sail in winter winds. By lowering the rim to its minimum height, usually 7.5 feet, you minimize the surface area exposed to gusts.
• Use the height actuator to lower the system smoothly
• Confirm the lock engages securely
• Do this before covering or relocating
This simple step prevents tipping and reduces stress on the pole and base, especially during icy storms or sudden wind events.
Make Covering Easier
A lowered hoop is easier to wrap and store in tight spaces.
• Fits better in garages or under overhangs
• Simplifies tarp application
• Prevents accidental snags when moving equipment
Even in-ground models benefit from this step. While they are anchored, lowering the height protects the backboard and rim from ice buildup and accidental impacts.
Cover with a Tarp and Bungee Cords

When indoor storage is not an option, a proper cover is your hoop’s best defense against snow, ice, and UV damage.
Apply a Heavy-Duty Tarp
Use a thick, waterproof tarp to shield the entire assembly.
• Drape it over the backboard first
• Pull the sides down around the pole
• Gather excess fabric at the base
The goal is to keep moisture off the backboard, rim, and pivot points. Ice accumulation can warp components or seize moving parts.
Secure with Bungee Cords
A loose tarp flaps in the wind and fails to protect. Use multiple bungee cords to lock it in place.
• Wrap cords around the pole and tarp bundle
• Attach to the base or anchor points if available
• Ensure no flapping edges remain
This creates a tight seal that prevents water intrusion and wind uplift. Think of it as putting your hoop into hibernation, dry, sealed, and protected.
Remove and Store Small Components
Do not overlook the small parts. Nets, pole pads, and lights degrade quickly when left outside all winter.
Take Off the Basketball Net
Nylon nets absorb water, freeze solid, and become brittle. Wind then shreds them.
• Remove the net before winter begins
• Wash and dry it thoroughly
• Store in a garage or bin
Even high-quality nets rarely survive a full winter outdoors. Replacing a 15-dollar net is cheaper than repairing a bent rim from a frozen, dragging net.
Store Pole Pads and Lights
Foam pole pads trap moisture and grow mold if left outside.
• Remove and dry completely
• Store indoors to prevent cracking and mildew
For hoops with solar LED lights, unplug and bring them inside. Extreme cold and ice can damage circuitry and lenses. Reattach them in spring when play resumes.
In-Ground vs. Portable: Different Needs

Your hoop’s installation type changes how you winterize it. Know the differences to apply the right steps.
Portable Hoops Need Full Prep
These units are designed to move, and that makes them vulnerable.
• Must manage base fluid by draining, treating, or sand-filling
• Must lower height and relocate from plow zones
• Require covering for full protection
Portable systems demand the most attention. Skipping steps risks total failure by spring.
In-Ground Hoops Need Minimal Care
Once installed, in-ground hoops are built to last.
• No base to drain or treat
• Already resistant to plows and wind
• Only lower the rim and optionally cover the backboard
Some users cover in-ground hoops to protect acrylic backboards from hail or ice chips, but it is not required. The main goal is reducing wind profile and preventing accidental damage during snow removal.
Spring Reactivation Checklist
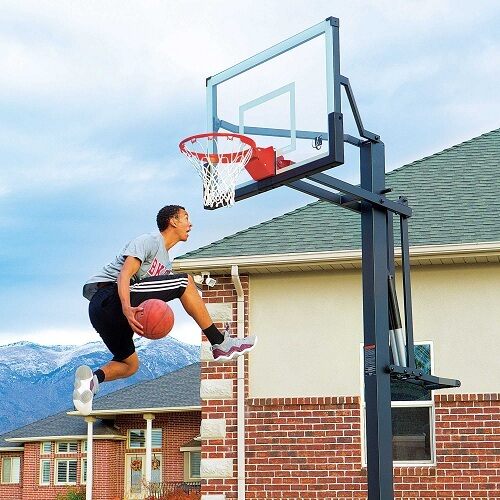
When warmer weather returns, do not just start playing. A quick inspection ensures your hoop is safe and functional.
Check for Leaks and Damage
If you used the partial-fill or antifreeze method, inspect the base for cracks.
• Look for hairline fractures or pooling water
• Refill to 100 percent capacity if water evaporated
• Replace the base if leaks are found
Even HDPE plastic can fail after repeated freeze-thaw cycles.
Replace Worn Parts
• Install a fresh basketball net if the old one is frayed
• Check the rim alignment and backboard mounting
• Replace any damaged hardware
Lubricate Moving Parts
Spray silicone lubricant on the height adjustment mechanism and pivot points.
• Ensures smooth raising and lowering
• Prevents rust from winter moisture
• Takes less than 5 minutes but improves performance
This small step keeps your hoop operating like new and prevents strain on the actuator.
Frequently Asked Questions About Storing Basketball Hoops in Winter
Should I drain the water from my portable basketball hoop base in winter?
Yes, draining the base completely is the safest option to prevent cracking. Water expands approximately 9 percent when frozen, which can split the base. If you prefer not to drain, you can use non-toxic antifreeze or fill with sand as alternatives.
Can I leave my basketball hoop outside during winter?
Yes, but you must prepare it properly. Lower the rim to 7.5 feet, cover with a tarp secured by bungee cords, and relocate away from snow plow routes. For portable hoops, managing the base fluid is critical. In-ground hoops require less preparation but benefit from lowering the height.
What happens if I do not winterize my basketball hoop?
Without proper winterization, the base can crack from ice expansion, the net can freeze and tear, the backboard can warp from ice accumulation, and the system can tip over in high winds. Spring could bring costly repairs or replacement.
Can I use regular automotive antifreeze in my basketball hoop base?
No, you must use non-toxic, propylene glycol-based antifreeze. Regular automotive antifreeze contains ethylene glycol, which is toxic to pets, wildlife, and groundwater. Non-toxic alternatives are available at most outdoor supply stores.
How long does it take to winterize a basketball hoop?
The process takes approximately 30 to 45 minutes for most portable hoops. This includes draining or treating the base, lowering the rim, relocating the unit, and applying the tarp cover. In-ground hoops require less time, usually around 15 to 20 minutes.
Key Takeaways for Storing Your Basketball Hoop in Winter
Proper winter storage keeps your basketball hoop safe, stable, and ready for action when spring arrives. The most important step is managing the base fluid by draining water, treating with non-toxic antifreeze, or switching to sand. Each method has pros and cons, but complete drainage offers the best protection against freeze damage. Lowering the rim to 7.5 feet reduces wind resistance and makes covering easier. Relocate your hoop at least 10 feet from curbs and driveways to avoid snow plow damage. Cover the entire assembly with a heavy-duty tarp secured by bungee cords. Remove and store small components like nets, pole pads, and solar lights indoors. In-ground hoops need minimal care compared to portable models, which require full preparation. When spring arrives, inspect for cracks, check fluid levels, replace worn parts, and lubricate moving parts. A little effort now saves hundreds in repairs later. Protect your hoop when the cold hits, and it will be ready for game time when warmer weather returns.