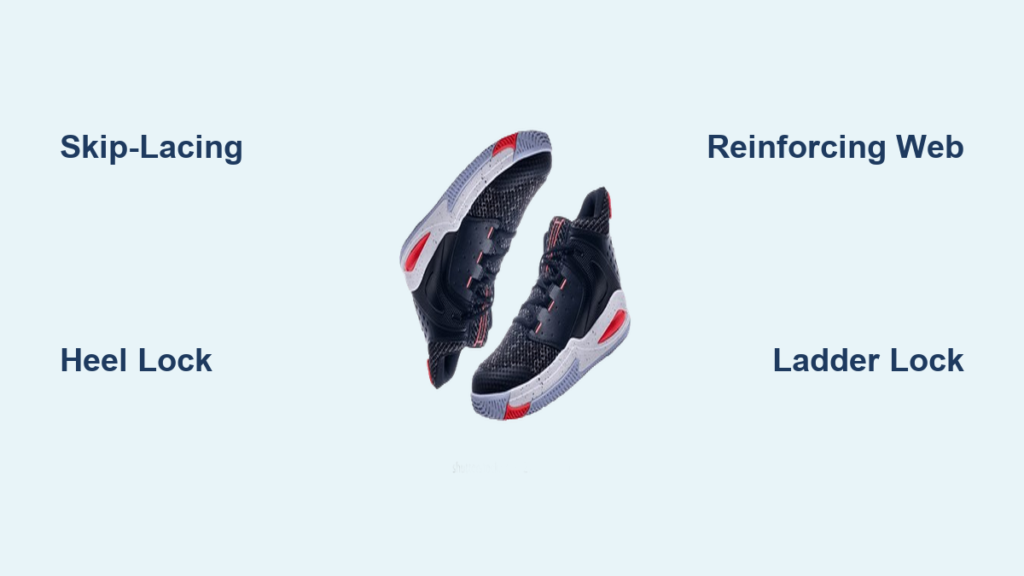
Ankle injuries are one of the most common setbacks in basketball. Sudden cuts, jumps, and pivots put immense stress on the joint, and a single wrong move can sideline you for weeks. While high-top shoes offer built-in structure, how you tie them matters just as much as the shoe itself. Most players lace up the same way every time, never realizing they could customize their fit, reduce slippage, and actively prevent sprains. In this guide, you will learn step-by-step techniques that lock your heel, stabilize your ankle, and turn any pair of sneakers into a protective shell.
Match Lacing to Your Arch Type

Your foot arch shape determines how pressure distributes when you lace your shoes. Using a one-size-fits-all method leads to pain, instability, or blisters. Customizing your lacing based on arch type ensures optimal support and comfort.
Fix High Arches with Skip-Lacing
High arches create a rigid foot structure that does not absorb shock well. This often leads to pressure on the top of the foot, also called the dorsal area. Standard crisscross lacing digs into this zone, causing numbness or fatigue during long games.
Why it works: Skip-lacing removes tension from the highest point of the arch. This allows the foot to move naturally while keeping the rest of the shoe secure.
Step-by-Step: Skip-Lacing for Comfort
- Start at the bottom. Thread the lace through the lowest eyelets so both ends are equal.
- Crisscross normally. Create two to three standard X crosses from the bottom.
- Skip the pressure zone. At the midfoot, skip two or three eyelets over the arch. Do not thread the lace through these holes.
- Resume crisscrossing. Continue the X pattern from the next available eyelet above the gap.
- Tie and tuck. Secure with a double knot. Tuck the bow behind the tongue to reduce pressure on the top of your foot.
Pro tip: This method is ideal for long games or players with top-of-foot pain. It keeps the ankle supported while giving the arch room to breathe.
Lock Down Flat Feet with Heel Lock
Flat feet or low arches tend to overpronate, rolling inward during movement. This instability increases the risk of ankle sprains and heel slippage, especially during lateral cuts.
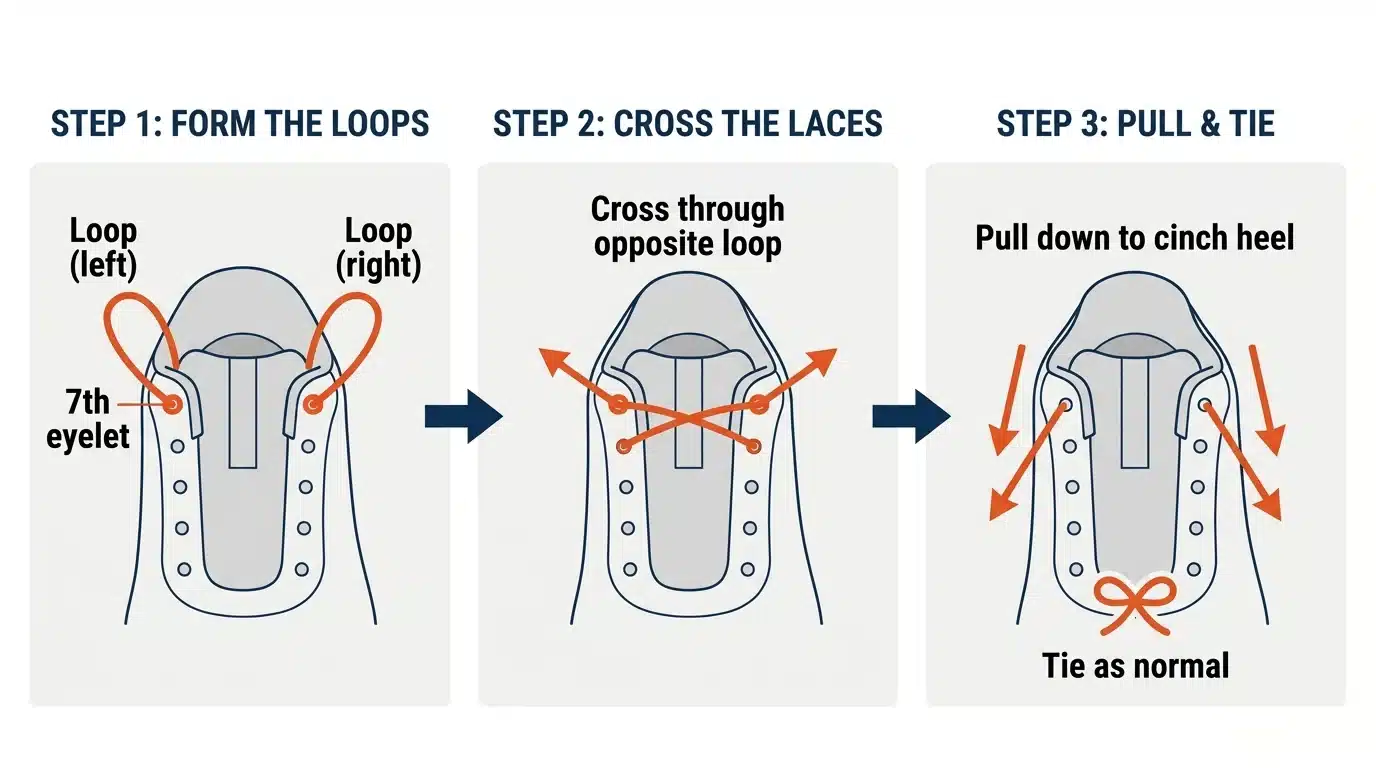
Why it works: The Heel Lock cinches the shoe collar around the ankle. This prevents heel lift and reduces internal foot movement.
Step-by-Step: Heel Lock Lacing
- Lace normally up to the top. Use a standard crisscross pattern through all eyelets except the last pair.
- Create vertical loops. Instead of crossing, thread each lace straight up the final eyelet on the same side. Leave a small loop hanging.
- Cross and thread. Take the left lace and pass it through the right loop. Do the same with the right lace through the left loop.
- Pull tight. Gently tug both ends to tighten the loops. This pulls the heel back and secures the ankle.
- Tie securely. Finish with a double knot. Tuck the bow into the side of the shoe to avoid interference.
Visual cue: When done correctly, the top of the shoe hugs your ankle like a seatbelt. Snug, but not cutting off circulation.
Boost Stability with Advanced Techniques
Even with proper arch-specific lacing, some players need extra ankle control. These situations include recovering from injury, playing on uneven surfaces, or having naturally loose ligaments. These advanced methods add structural reinforcement without braces or tape.
Apply the Reinforcing Web
The Reinforcing Web creates a supportive net across the shoe upper. It mimics the effect of an ankle brace and is ideal for players prone to rolling their ankles.
Why it works: The interwoven pattern pulls the sides of the shoe inward. This limits lateral movement and distributes pressure evenly.
Step-by-Step: Reinforcing Web
- Lace normally to the top. Use crisscross lacing up to the second-to-last eyelet pair.
- Form diagonal stitches. Take the left lace and thread it from inside to outside through the last eyelet. Repeat with the right lace on the opposite side. This creates two outward-facing loops.
- Weave the web. Pass the left lace through the right-side loop. Pass the right lace through the left-side loop.
- Tighten evenly. Pull both ends outward and upward to lock the web in place.
- Tie a bow. Complete with a secure knot.
Common mistake: Pulling too hard and restricting ankle mobility. Aim for firm, not rigid, tension.
Use the Ladder Lock for Extra Grip
The Ladder Lock method uses horizontal anchors and interwoven laces to stabilize the midfoot and ankle. It creates a locked feel around the ankle without compressing the arch.
Why it works: This technique is great for players with mixed support needs. It offers targeted ankle control while maintaining midfoot comfort.
Step-by-Step: Ladder Lock
- Anchor the base. Thread the left lace from inside to outside through the first eyelet. Go from outside to inside through the second eyelet, forming a horizontal stitch. Repeat on the right side.
- Cross and weave. Cross the laces over the tongue. Weave the left lace under the right-side horizontal stitch. Weave the right lace under the left-side horizontal stitch.
- Pull tight. Secure the weave by pulling both ends firmly.
- Continue lacing. Resume normal crisscrossing to the top.
- Finish with a knot. Tie and tuck the ends.
Best for: Players who want targeted ankle control without sacrificing midfoot comfort.
Prevent Injury with Smart Lacing Habits
Even the best technique fails without proper execution. These habits ensure your lacing stays effective from warm-up to final buzzer.
Avoid Common Lacing Mistakes
Many players unknowingly compromise support with poor habits. Here are the most damaging ones.
• Uneven laces. Starting with mismatched lengths leads to uneven tension and instability.
• Over-tightening. Squeezing the foot cuts off circulation and causes numbness or cramping.
• Loose knots. A single knot unravels during play, undoing all your hard work.
• Ignoring the top eyelet. Skipping the Heel Lock defeats the purpose of high-top shoes.
Fix it: Always double-check lace length, tension, and knot security before stepping on the court.
Choose the Right Laces
Not all laces are created equal. Thin or stretchy laces loosen mid-game, especially under heavy use.
• Flat, non-slip laces stay tight longer.
• Round laces may loosen faster but glide more easily through eyelets.
• Textured or rubberized laces offer better grip and durability.
Upgrade tip: Consider waxed or silicone-coated laces for games. They resist fraying and slipping.
Know When to Use Each Method
Not every technique suits every player. Match the lacing style to your needs for maximum benefit.
Heel Lock: Best for Jumping and Defense
Use when: You cut hard, jump frequently, or have a loose heel.
Why: Prevents heel lift during takeoff and landing, reducing Achilles strain and blister risk.
Ideal for: Guards, wings, and anyone who plays aggressively on defense.
Reinforcing Web: Top Choice for Weak Ankles

Use when: You have had past sprains or play on cracked pavement or uneven courts.
Why: Limits side-to-side roll and adds structural rigidity.
Ideal for: Post-injury recovery, outdoor play, or players with naturally loose ligaments.
Skip-Lacing: Essential for High Arches
Use when: Your foot aches across the top after games.
Why: Frees the dorsal area from pressure while keeping the ankle secure.
Ideal for: Players with rigid feet or narrow shoes that press on the instep.
Standard Crisscross: For General Play
Use when: You need a quick, reliable method and have no specific issues.
Limitation: Offers minimal ankle lockdown compared to advanced methods.
Upgrade it: Combine with a Heel Lock using the top eyelet for better support.
Optimize Fit and Longevity
Great lacing is not just about tying. It is about maintaining performance over time.
Replace Worn Laces Regularly
Frayed or stretched laces cannot hold tension. Even the best technique becomes ineffective.
• Check every four to six weeks if you play three or more times per week.
• Replace immediately if you notice thinning, knots slipping, or difficulty maintaining tightness.
Clean Eyelets to Prevent Snagging
Dirt and debris in eyelets cause laces to catch or tear.
• Clean monthly with a toothpick or small brush.
• Lubricate occasionally with a drop of silicone spray for smooth threading.
Combine with Insoles for Extra Support
Aftermarket insoles can enhance arch support and work synergistically with proper lacing.
• High arches. Use cushioned insoles with arch fill.
• Flat feet. Choose motion-control insoles with medial posting.
• Pair with lacing. The insole supports from below. Lacing stabilizes from above.
Frequently Asked Questions About How to Tie Basketball Shoes for Ankle Support
Does the Heel Lock work on low-top basketball shoes?
Yes. The Heel Lock technique uses the top eyelet of any shoe with a minimum of four eyelet pairs. Even low-top sneakers benefit from this method, though high-top shoes provide more natural ankle support overall.
How long does it take to learn these lacing techniques?
These methods take seconds to learn and under 30 seconds to implement once practiced. Most players master them within two or three attempts.
Can these techniques prevent all ankle injuries?
Proper lacing significantly reduces the risk of ankle sprains and blisters. However, it cannot prevent every injury, especially from awkward landings or collisions. Combining good lacing with ankle braces for high-risk situations provides the best protection.
Should I use lace locks or lace tips for basketball?
Lace locks help maintain tension during long games or runs. They are optional but useful for players who struggle with loosening knots. Specialized lace tips make threading easier and prevent fraying.
How do I know if my laces are too tight?
Signs include numbness, tingling, or cold toes. You should feel snugness around the ankle, not pain or pressure across the top of your foot. Loosen slightly if you experience any circulation issues.
Key Takeaways for Locking in Ankle Support

How you tie your basketball shoes directly impacts your stability, comfort, and injury risk. Whether you are a weekend warrior or a competitive player, taking 30 seconds to apply the right technique transforms your performance.
First, match your lacing method to your arch type. High arches need skip-lacing for pressure relief, while flat feet benefit from the Heel Lock for stability. Second, use advanced techniques like the Reinforcing Web when you need extra lateral support, especially if you have a history of ankle injuries. Third, always double-knot and tuck your laces to prevent mid-game loosening. Finally, maintain your laces by replacing worn pairs and keeping eyelets clean.
With these techniques, you are not just lacing up. You are locking in confidence with every step on the court.