Installing an in-ground basketball hoop is a long-term investment, and the foundation determines its durability, stability, and safety. The type of concrete for basketball hoop installation directly impacts how well the system withstands dunking, wind, and seasonal freeze-thaw cycles. Most manufacturers recommend high-strength concrete with a compressive strength of 3,500 to 4,000 psi, meeting ASTM C387 standards. Using the wrong concrete mix risks wobbly poles, cracking, and costly repairs. In this guide, you will learn the exact specifications, mixing techniques, hole dimensions, and curing practices to build a rock-solid foundation that lasts decades.
Choose High-Strength Concrete (3,500–4,000 psi)

The compressive strength of concrete measures how much pressure per square inch the material can withstand before breaking. For basketball hoop installations, this rating is critical because the foundation must resist constant dynamic loads from players dunking and wind exposure.
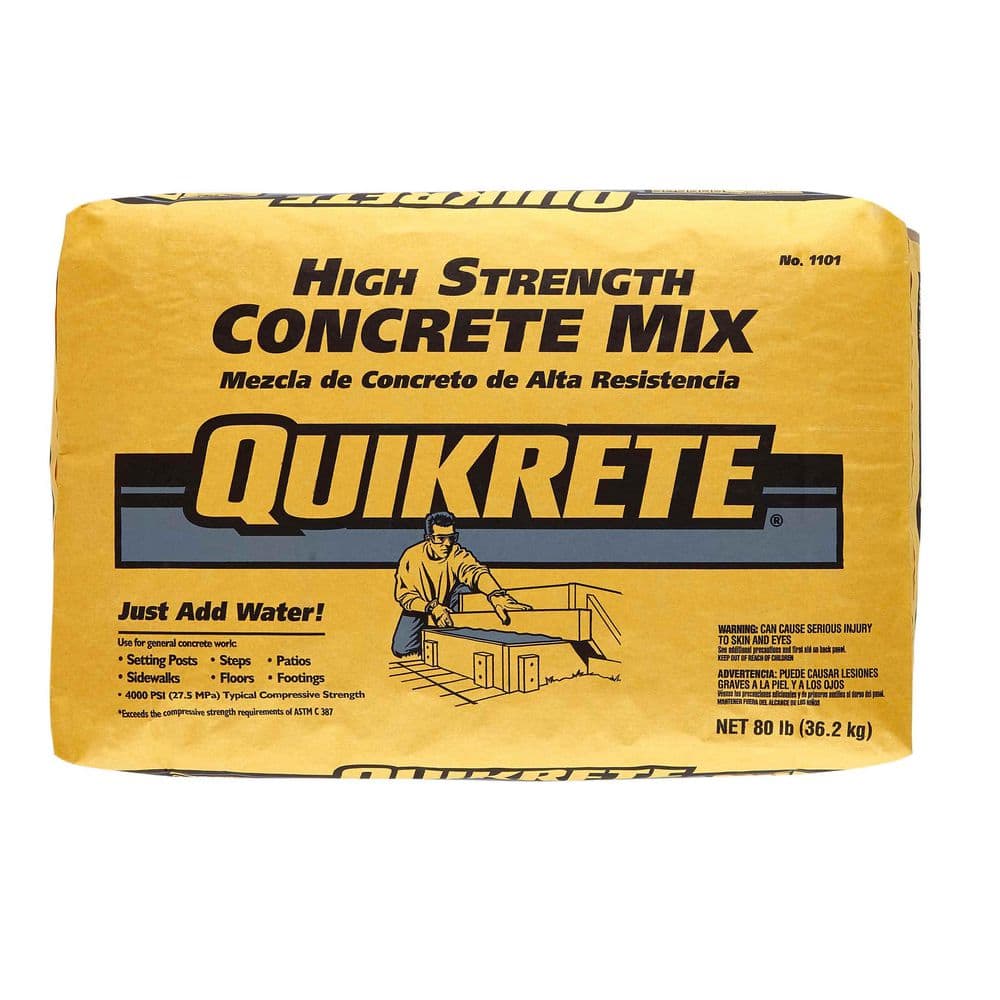
Select concrete specifically labeled as “high-strength” with a rating between 3,500 and 4,000 psi. This specification ensures the mix can endure long-term stress from play and weather. These mixes often include additives like fiberglass reinforcement, which improves bond strength and reduces cracking.
Avoid standard 2,500 psi mixes commonly sold for patios or walkways. They lack the structural integrity needed for a basketball hoop base. Always check the psi rating on the label before purchasing.
Use ASTM-Compliant Concrete Mix
For maximum durability, select concrete that meets ASTM C387 standards, which guarantees consistent strength and performance. Goalrilla, a leading manufacturer, explicitly recommends concrete meeting this specification, emphasizing that foundation strength is non-negotiable for permanent installations.
Avoid Fast-Setting Concrete for Full Installations
Fast-setting concrete reaches handling strength in 20 to 40 minutes and can support light loads in 4 hours. While tempting for DIYers, it is not ideal for full 48-inch-deep hoop installations. It generates more heat during curing, increasing the risk of thermal cracking. It also has slightly lower final compressive strength than standard high-strength mixes.
Use fast-setting concrete only for minor repairs or shallow anchoring, not for permanent installations. If you must use it, ensure the mix still meets 3,500 plus psi standards.
Calculate Concrete Quantity for Your Hoop Type
The amount of concrete required depends on hole depth, diameter, and anchor type. Purchasing slightly more than calculated prevents running out mid-pour.
Standard In-Ground Holes Need 11–14 Bags
For most in-ground systems, plan for 11 to 14 bags of 80-lb concrete mix. Here is a breakdown by brand.
Goalrilla requires a 16-inch diameter by 48-inch deep hole, needing approximately 11 to 13 bags. Lifetime systems require 18 to 24 inches in diameter and 21 to 48 inches deep, needing 420 to 640 pounds. Mega Slam 60 requires a 20 by 20 inch square hole at 48 inches deep, needing about 12 bags.
Always buy one extra bag. Spillage, uneven mixing, and miscalculations happen. It is cheaper to have surplus than to run out mid-pour.
Bolt-Down Systems Require 1,000+ Pounds
Bolt-down anchors use a bell-shaped hole requiring significantly more concrete, between 1,040 and 1,680 pounds. This larger footing provides superior resistance to tipping, especially in high-wind areas or with extended overhangs.
Because of the volume, consider renting a concrete mixer for consistent blending, using a wheelbarrow for transport, and having 2 to 3 helpers to manage the pour.
Mix Concrete to Oatmeal-Like Consistency
Proper mixing is as critical as the concrete type. Too much water weakens the final product. Too little prevents proper curing.
Follow Exact Water-to-Mix Ratios
Use these ratios for proper consistency.
80-lb bag requires 6 pints (2.8 liters) of water. 60-lb bag requires 4 pints (1.9 liters) of water. No measuring cup? A 2-liter soda bottle is a reliable substitute. Add water gradually. Mix dry first, then form a crater and pour in the water. Stir thoroughly with a hoe or power mixer.
Test Mix with the Hand Squeeze Method
After mixing, wear gloves and grab a handful of concrete. Squeeze it to test consistency. If it drips or oozes, it is too wet. Add more dry mix. If it crumbles, it is too dry. Add water in small amounts. If it holds shape like oatmeal, it is ready to pour.
This hand test is the most reliable field method. Never let mixed concrete sit longer than 30 to 45 minutes, especially in hot weather. It begins curing immediately and loses strength if rehydrated.
Dig the Correct Hole Dimensions

The geometry of the excavation directly influences the stability of the final installation. Always check your manufacturer is manual for specific requirements.
Depth: 48 Inches Is Standard
For optimal stability, dig 48 inches deep (4 feet). This depth places the base below most frost lines in the United States, preventing heaving. Some systems allow 24 to 30 inches in mild climates, but deeper is always better.
Never pour on frozen ground. Thaw the soil completely first. Cold ground prevents proper curing and bonding, leading to cracks and shifting.
Diameter: 16–24 Inches Depending on Brand
Hole width varies by manufacturer. Goalrilla requires 16 inches. Lifetime requires 18 to 24 inches. Mega Slam 60 requires a 20 by 20 inch square hole.
A hole too narrow restricts concrete flow. Too wide wastes material. Check your manufacturer is manual before digging.
Bell the Bottom for Extra Stability
Widen the bottom 6 to 8 inches of the hole slightly (1 to 2 inches wider than the top). This bell shape creates a larger concrete footing that resists upward lift and tipping forces.
Use a post hole digger or auger with a digging tip to flare the base. This step is mandatory for bolt-down systems and highly recommended for all in-ground installations.
Prepare the Base with Proper Drainage
Proper base preparation prevents water accumulation, which leads to frost heaves in cold climates or corrosion of the pole and sleeve.
Add 2–3 Inches of Gravel at Bottom
Before pouring, place 2 to 3 inches of gravel in the hole. This layer prevents water pooling, reduces frost heave risk, and provides a stable platform for leveling bricks.
Use clean, crushed stone (1/4 inch to 1/2 inch size). Avoid sand or soil, which retain moisture.
Level Bricks or Pavers for Anchor Height
Stack concrete bricks or pavers on the gravel to raise the anchor sleeve or base plate. The top must sit flush with or slightly above the final concrete surface.
Use a spirit level to ensure the bricks are perfectly flat. Even a 1/8-inch tilt can result in a crooked pole. For threaded rod systems, use leveling nuts to fine-tune height after pouring.
Install the Right Anchor System
Different basketball hoop systems utilize distinct anchoring mechanisms, each with specific installation requirements.
Ground Sleeve: Best for Removable Poles
A metal ground sleeve (approximately 16 inches long) is embedded in concrete, allowing the pole to be inserted and removed later. This is ideal for future upgrades, driveway repairs, or seasonal removal.
Install the sleeve on leveled bricks. Slots must face the court, and a locking pin must sit above the concrete line. Use a ruler through the slot to verify alignment.
J-Bolts: Simple but Hard to Align
J-bolts are bent rods embedded in concrete. The pole base plate is then bolted over the protruding threads. They offer no sleeve to lose and provide direct metal-to-concrete bond. However, they are hard to keep vertical during pour and require lifting the heavy pole onto bolts.
Use a template board with pre-drilled holes to hold bolts in place while pouring.
Hinge and All-Thread Systems: Professional-Grade Stability
Hinge anchors let you assemble the hoop on the ground and swing it into place, which is safer and easier. All-thread rods (36 inches by 7/8 inch) offer superior strength and leveling control. Lower nuts set base height, upper nuts lock in place, and an optional 90-degree bend at the bottom prevents rotation.
Pour and Finish Concrete Correctly

The pouring and finishing process determines the final strength and appearance of the foundation.
Pour in Stages with Rebar Reinforcement
Fill half the hole with concrete first. Insert rebar with 6-inch spacing, extending from base to top. Lower anchor into wet mix. Complete the pour, agitating to remove air pockets.
Rebar adds tensile strength, preventing cracks from ground movement or impact stress.
Slope Surface for Water Runoff
Use a magnesium float or trowel to finish the surface. Slope it slightly away from the pole (1/8 inch per foot) so water drains off. A raised lip around the base (using 2×4 forms) prevents water from entering the sleeve.
Remove forms after 24 hours. Do not walk on or load the base yet.
Allow Adequate Curing Time Before Use
Concrete gains strength over time through a chemical curing process. Rushing this step compromises the entire installation.
Wait 72 Hours Minimum
Do not install the pole for at least 72 hours (3 days). Even if the surface feels hard, the internal structure is still curing.
Cool weather (below 60 degrees Fahrenheit) requires adding 1 to 2 extra days. Ideal temperature (60 to 80 degrees Fahrenheit) allows 3 to 5 days. Goalrilla recommends waiting 5 full days for rock-solid stability.
Use Curing Blankets in Cold Weather
If installing when temperatures are below 40 degrees Fahrenheit, use concrete curing blankets (50 to 60 dollars). These trap heat and moisture, preventing freezing and ensuring proper chemical reaction.
Never pour in freezing conditions without protection. Frozen concrete loses up to 50 percent of its strength and may crack within weeks.
Verify Alignment and Overhang Specifications

After the concrete cures, proper alignment ensures the hoop plays correctly and safely.
Keep Pole Plumb and Aligned
Use a spirit level on the sleeve or base during and after pouring. Check front-to-back plumb, side-to-side plumb, and rotation (slots facing court).
Even slight misalignment causes the backboard to angle incorrectly. Recheck after every bucket of concrete.
Limit Overhang to 4 Feet Max
Overhang is the distance from pole center to backboard face. Ideal range is 2 to 4 feet.
More than 5 feet overhang increases leverage, causing excessive shaking. A 5-foot overhang plus 25-inch rim equals over 7 feet of encroachment into the playing area.
Check your model is overhang chart. Some systems reduce overhang as height increases.
Frequently Asked Questions About Concrete for Basketball Hoop Installation
What is the best psi for basketball hoop concrete?
The best psi for basketball hoop concrete is 3,500 to 4,000 psi. This high-strength rating ensures the foundation can withstand the dynamic loads from dunking, wind, and seasonal temperature changes without cracking or shifting.
Can I use regular concrete mix for a basketball hoop?
You can use regular concrete mix, but it must be high-strength (3,500 to 4,000 psi) and meet ASTM C387 standards. Standard patio or walkway concrete (2,500 psi) lacks the structural integrity needed for permanent basketball hoop installations.
How many bags of concrete do I need for a basketball hoop?
Most in-ground basketball hoops need 11 to 14 bags of 80-lb concrete mix. Bolt-down systems require significantly more, between 1,040 and 1,680 pounds. Always buy one extra bag to account for spillage or miscalculations.
How deep should I dig the hole for a basketball hoop?
You should dig 48 inches deep (4 feet) for a basketball hoop. This depth places the base below most frost lines, preventing heaving from freeze-thaw cycles. Some manufacturers allow shallower holes in mild climates, but deeper is always better for stability.
How long does concrete take to cure before installing the pole?
Concrete takes at least 72 hours (3 days) to cure before installing the pole. Manufacturers like Goalrilla recommend waiting 5 full days for optimal strength. Add extra time in cool weather below 60 degrees Fahrenheit.
Key Takeaways for Basketball Hoop Concrete Installation
The best type of concrete for basketball hoop installation is a 3,500 to 4,000 psi high-strength mix meeting ASTM C387 standards. This specification ensures the foundation can support years of hard play without cracking or shifting. Avoid fast-setting mixes for permanent installations, as they generate excess heat during curing and have lower final strength.
Calculate your concrete quantity based on hole dimensions. Standard in-ground systems need 11 to 14 bags of 80-lb mix. Bolt-down systems require 1,000+ pounds. Dig 48 inches deep and bell the bottom for extra stability against tipping forces. Add 2 to 3 inches of gravel for drainage and level bricks or pavers to set anchor height.
Mix to oatmeal-like consistency using exact water ratios (6 pints for 80-lb bags, 4 pints for 60-lb bags). Test with the hand squeeze method. Pour in stages with rebar reinforcement, slope the surface for water runoff, and cure for at least 3 to 5 days before installing the pole. Call 811 before digging, work with a team of 2 to 3 people, and use proper anchor systems (ground sleeve, J-bolts, or all-thread) for your specific hoop model. Taking time with the foundation prevents wobbly hoops and costly repairs down the road.